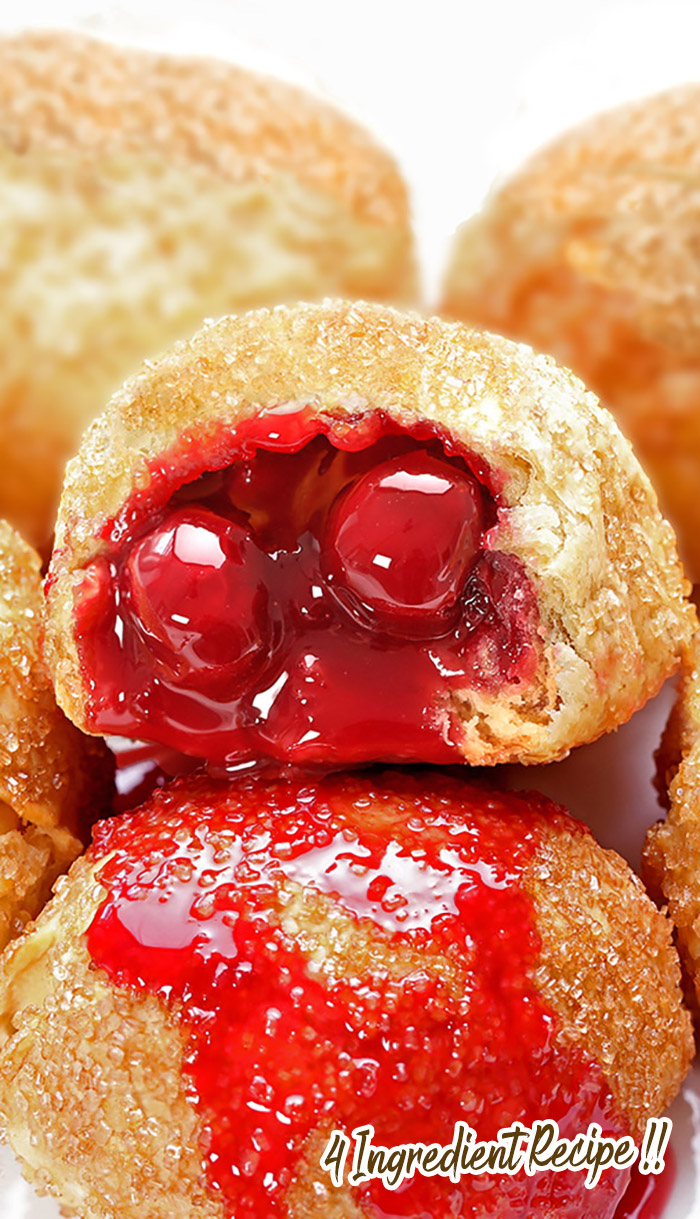
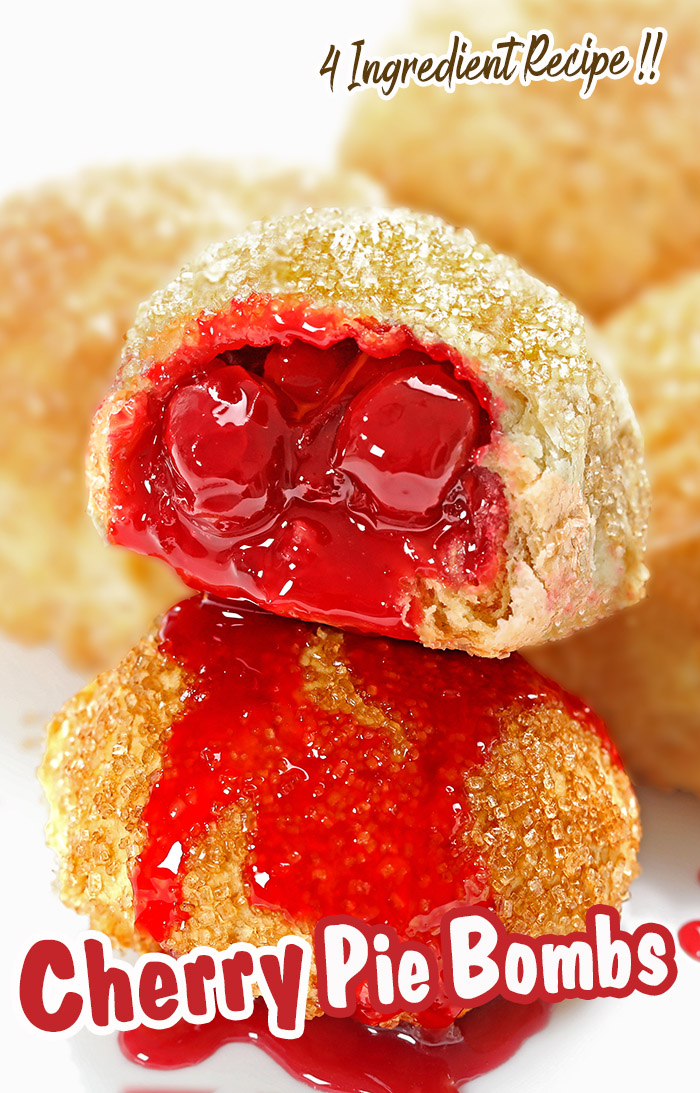
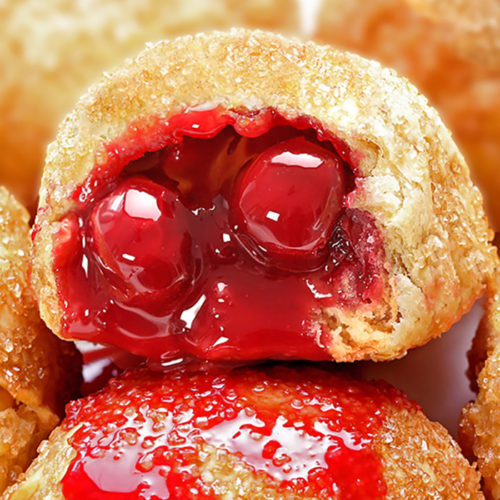
Cherry Pie Bombs – Cherry pie filling wrapped in biscuit dough with crunchy cinnamon sugar coating and cooked in an Air Fryer. Perfect to serve at your next Spring or Summer party.
Your family will love these bombs and beg for more.
I’m sure you’re drooling right now over these yummy cherry pie bombs!
How to Make Air Fryer Cherry Pie Bombs
Air Fryer Cherry Pie Bombs have all of the tastes of a homemade cherry pie without all of the work. Making these with canned cherry pie filling and canned biscuit dough gets it done quickly.
First, gather your ingredients. You’ll need just 4 ingredients for this delicious snack!
Grand biscuits – Canned or Homemade or Crescent rolls, Crescent dough
Cherry pie filling – Canned or Homemade
Butter – melted
Cinnamon sugar
How to Make Cherry Pie Bombs
Preheat the air fryer for five minutes while you prepare the cherry pie bombs. Gently pull apart each biscuit, creating two fairly even layers of dough.
Work quickly while the dough is still cold. Once the dough starts to warm up to room temperature, it becomes much more difficult to separate the layers evenly.
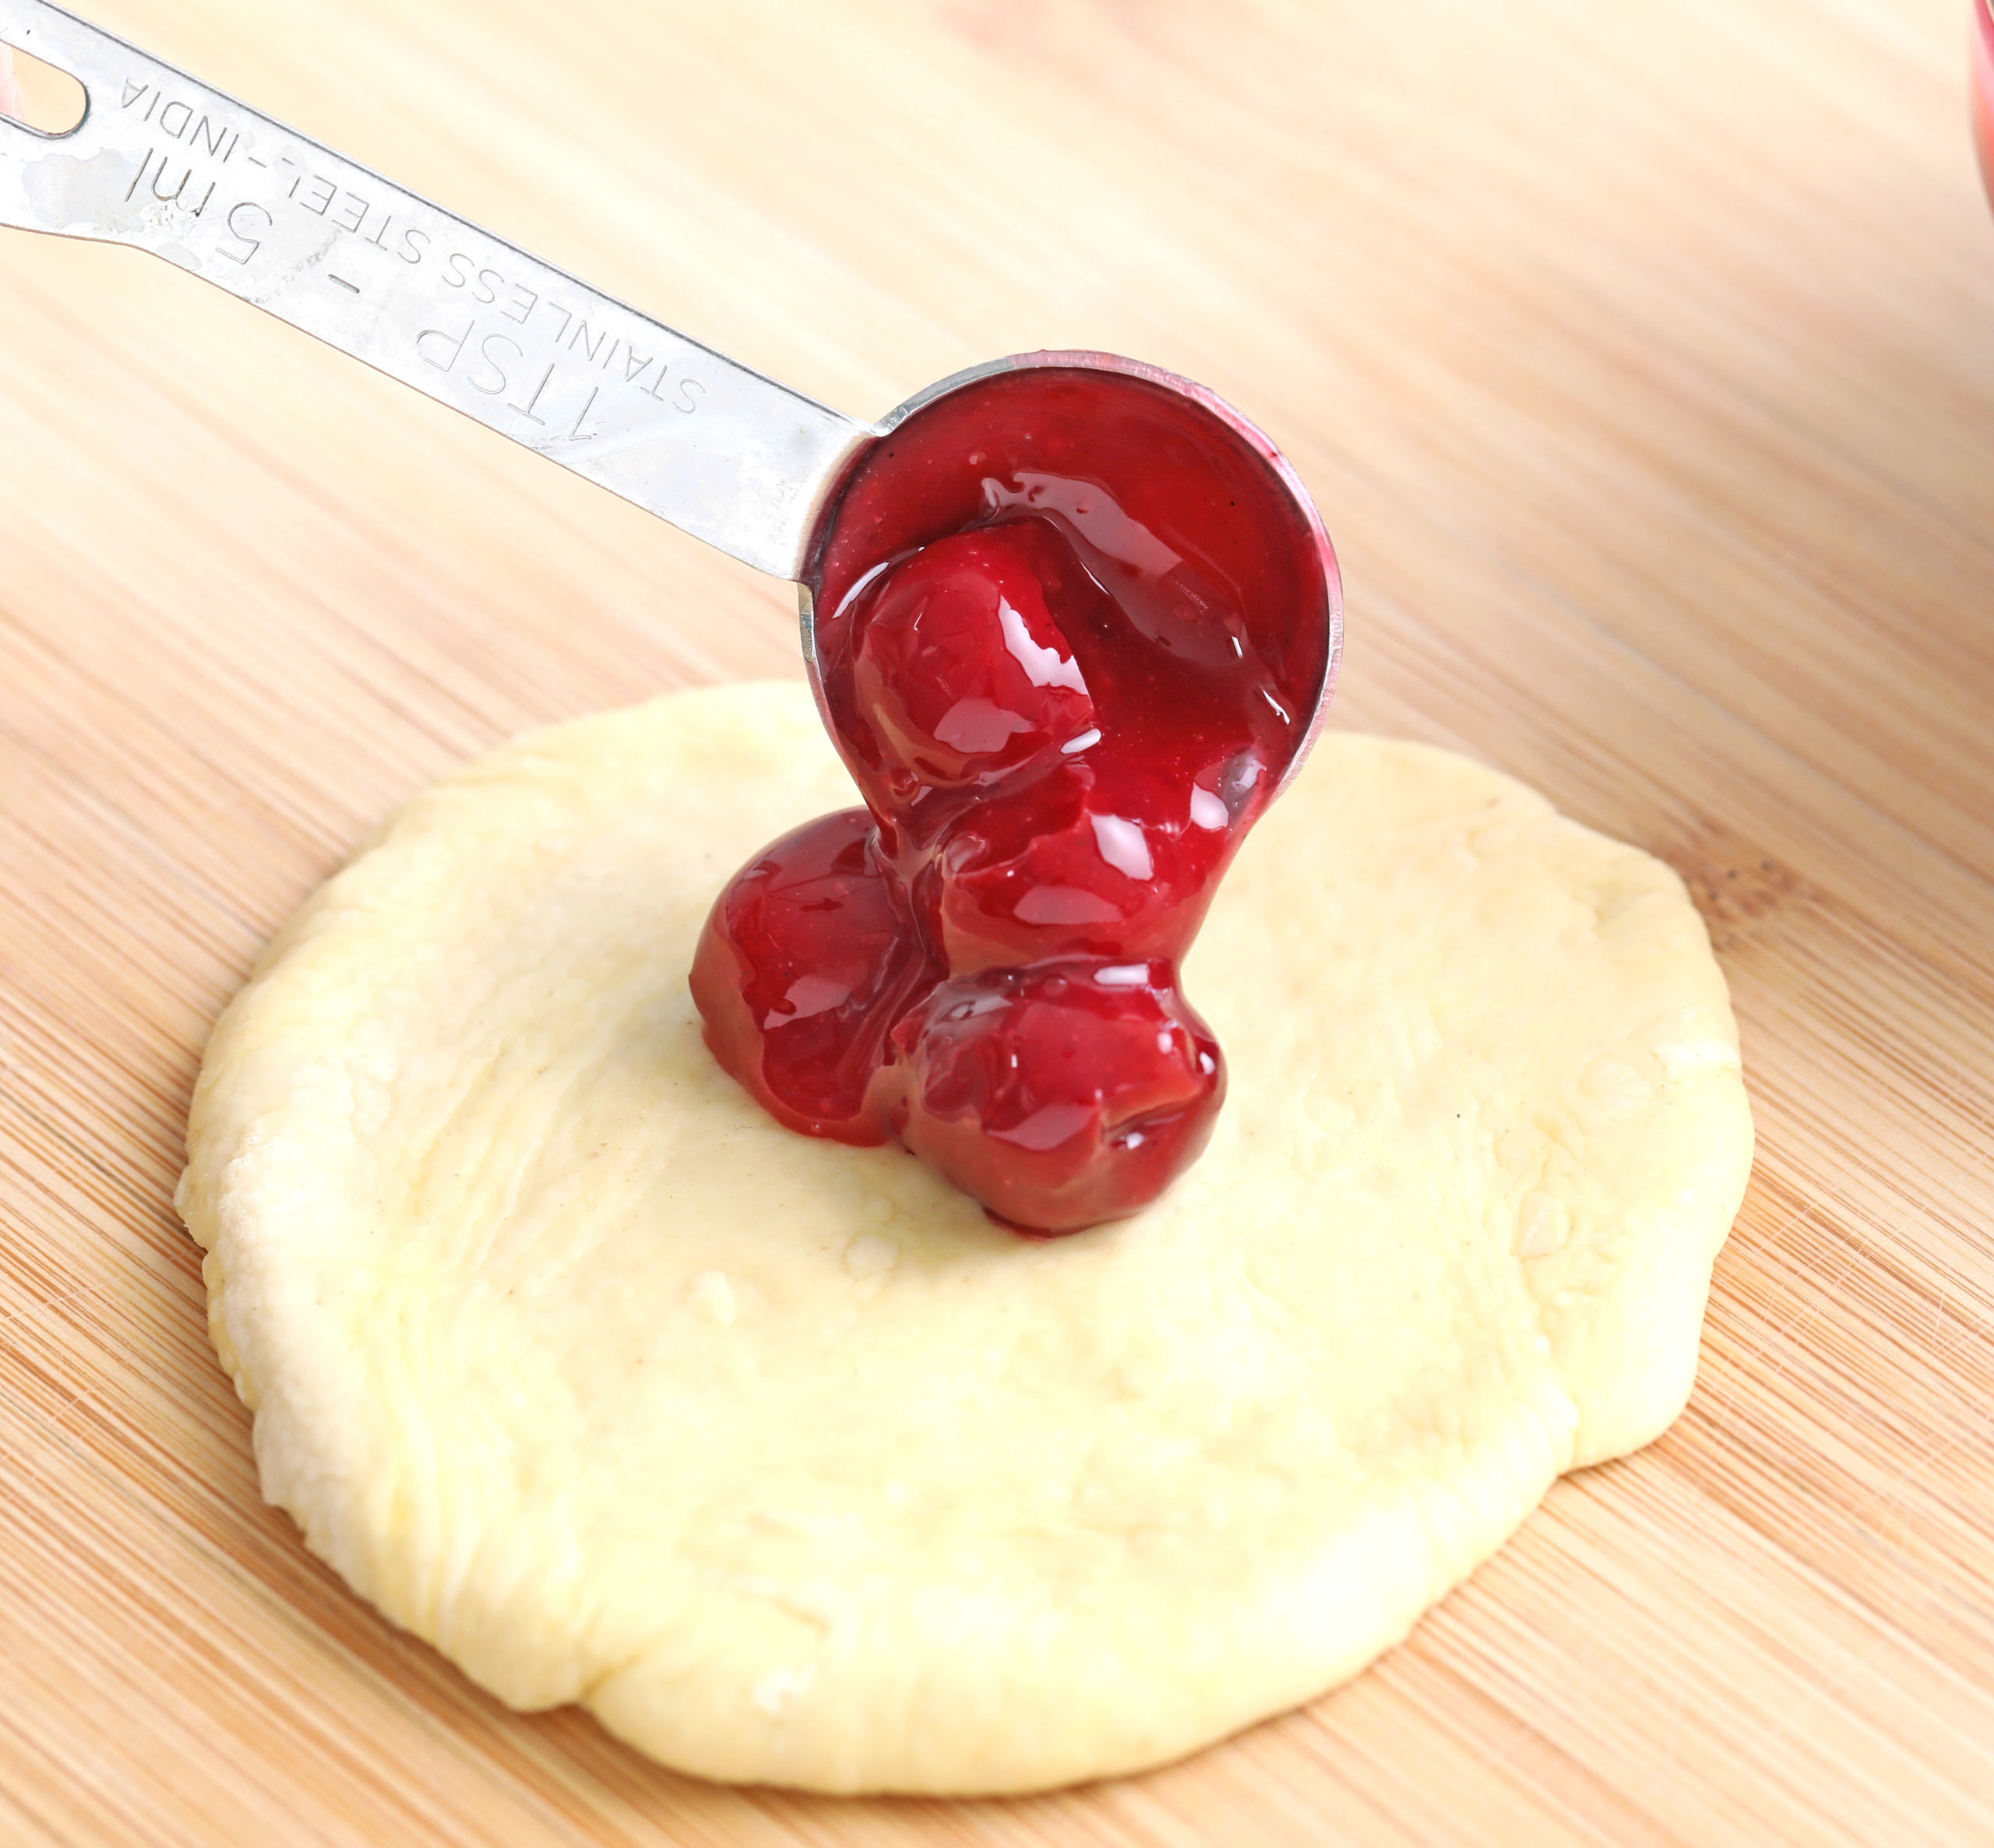
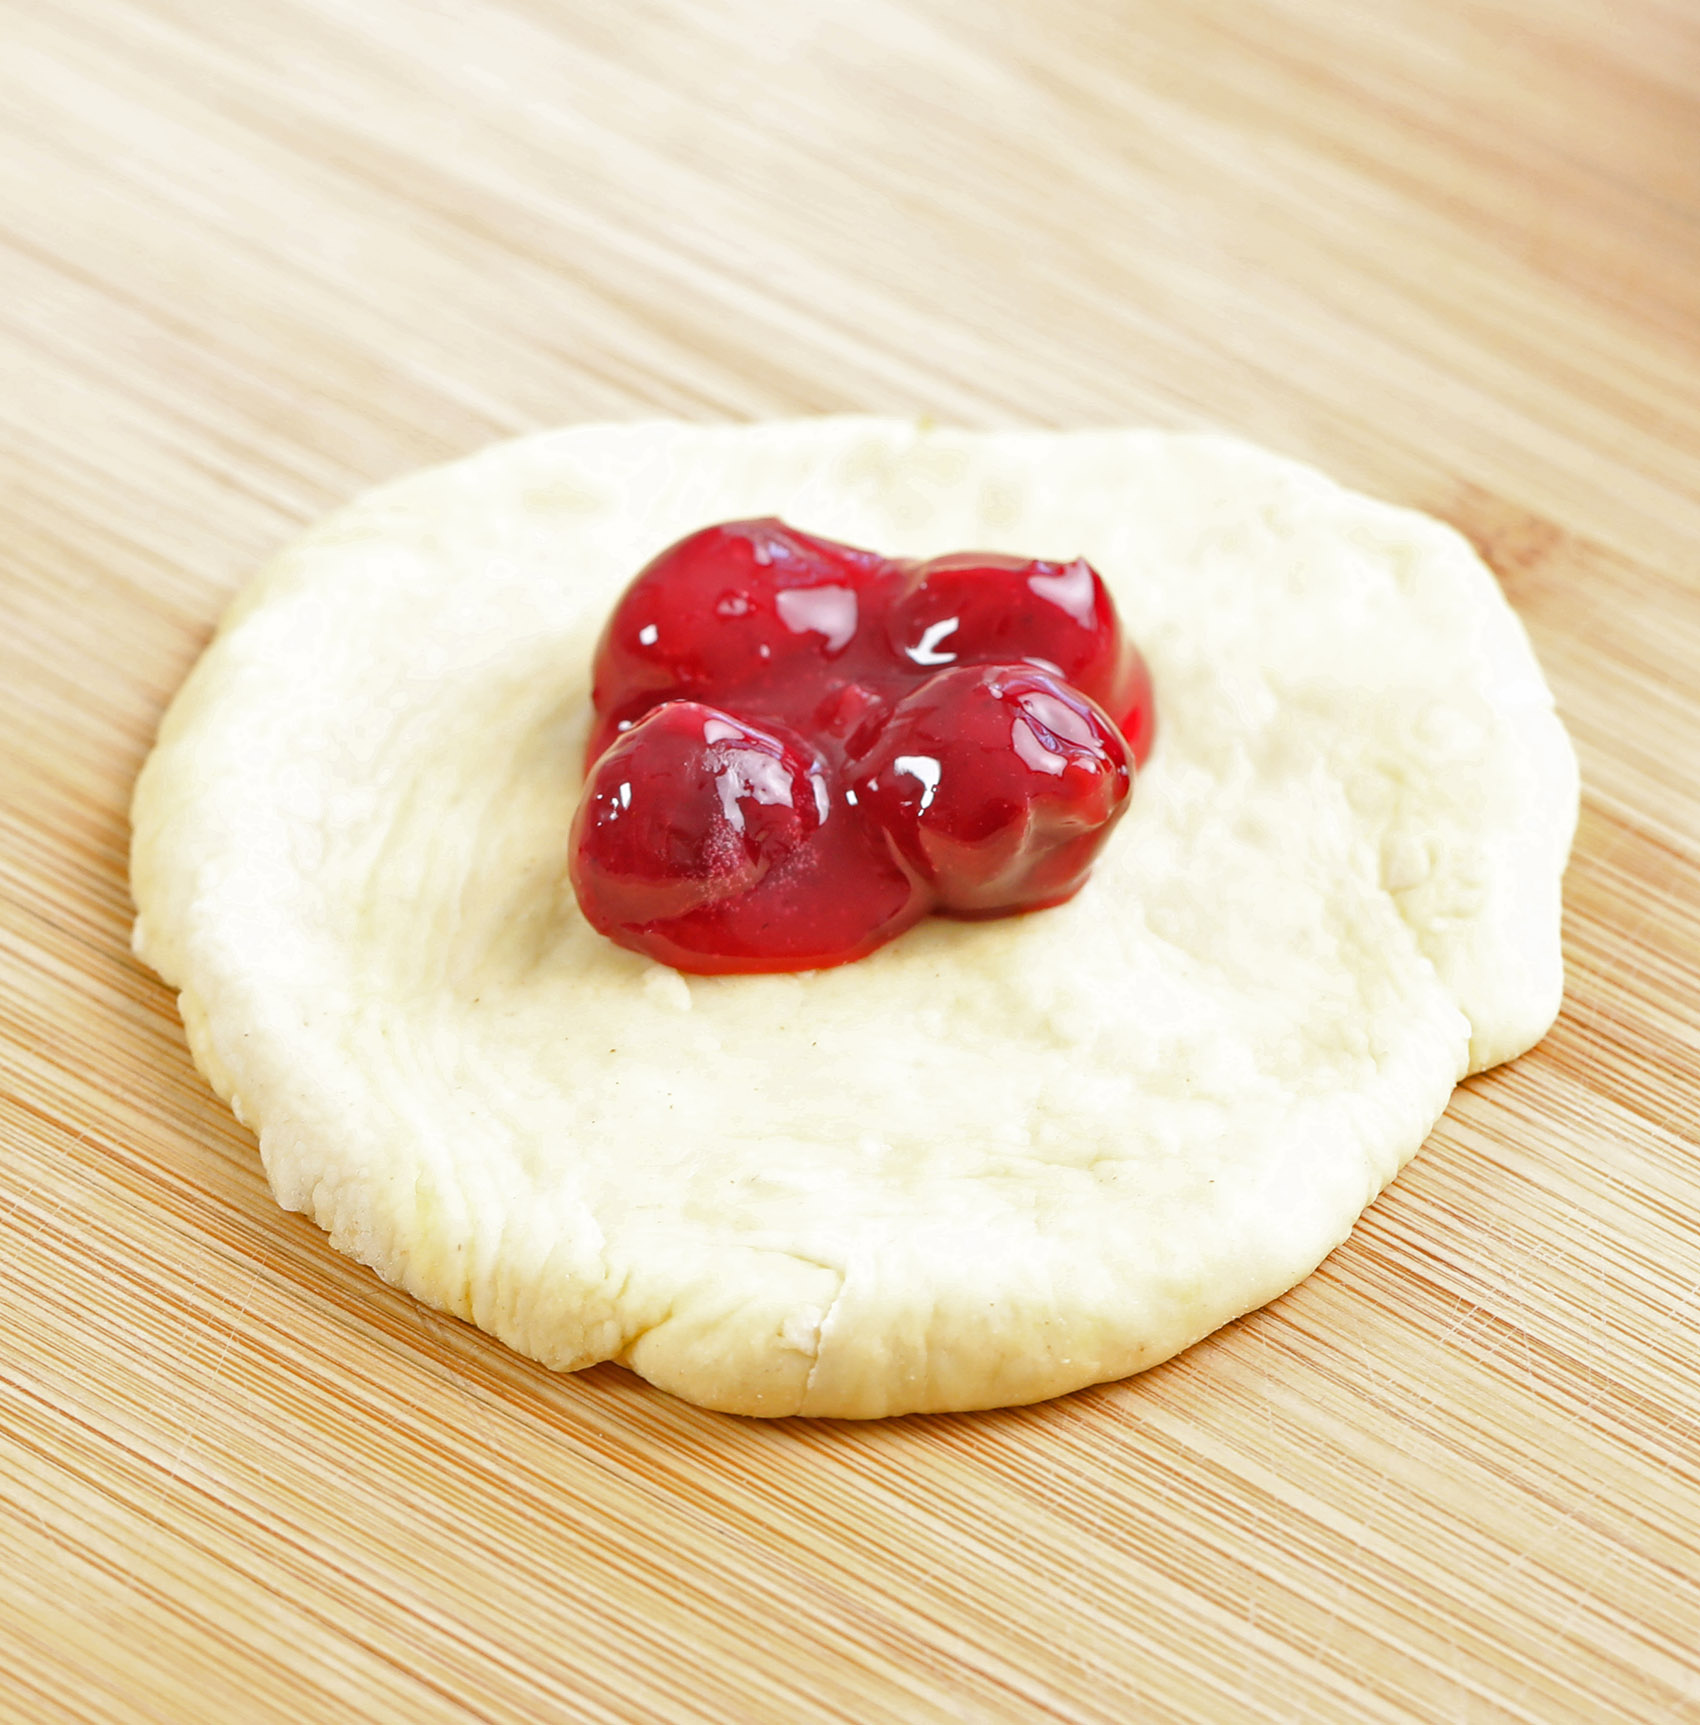
Using a rolling pin or the palm of your hand, flatten each layer into a 4″ circle. Spoon a tablespoon or so of cherry pie filling into the center of the circle.
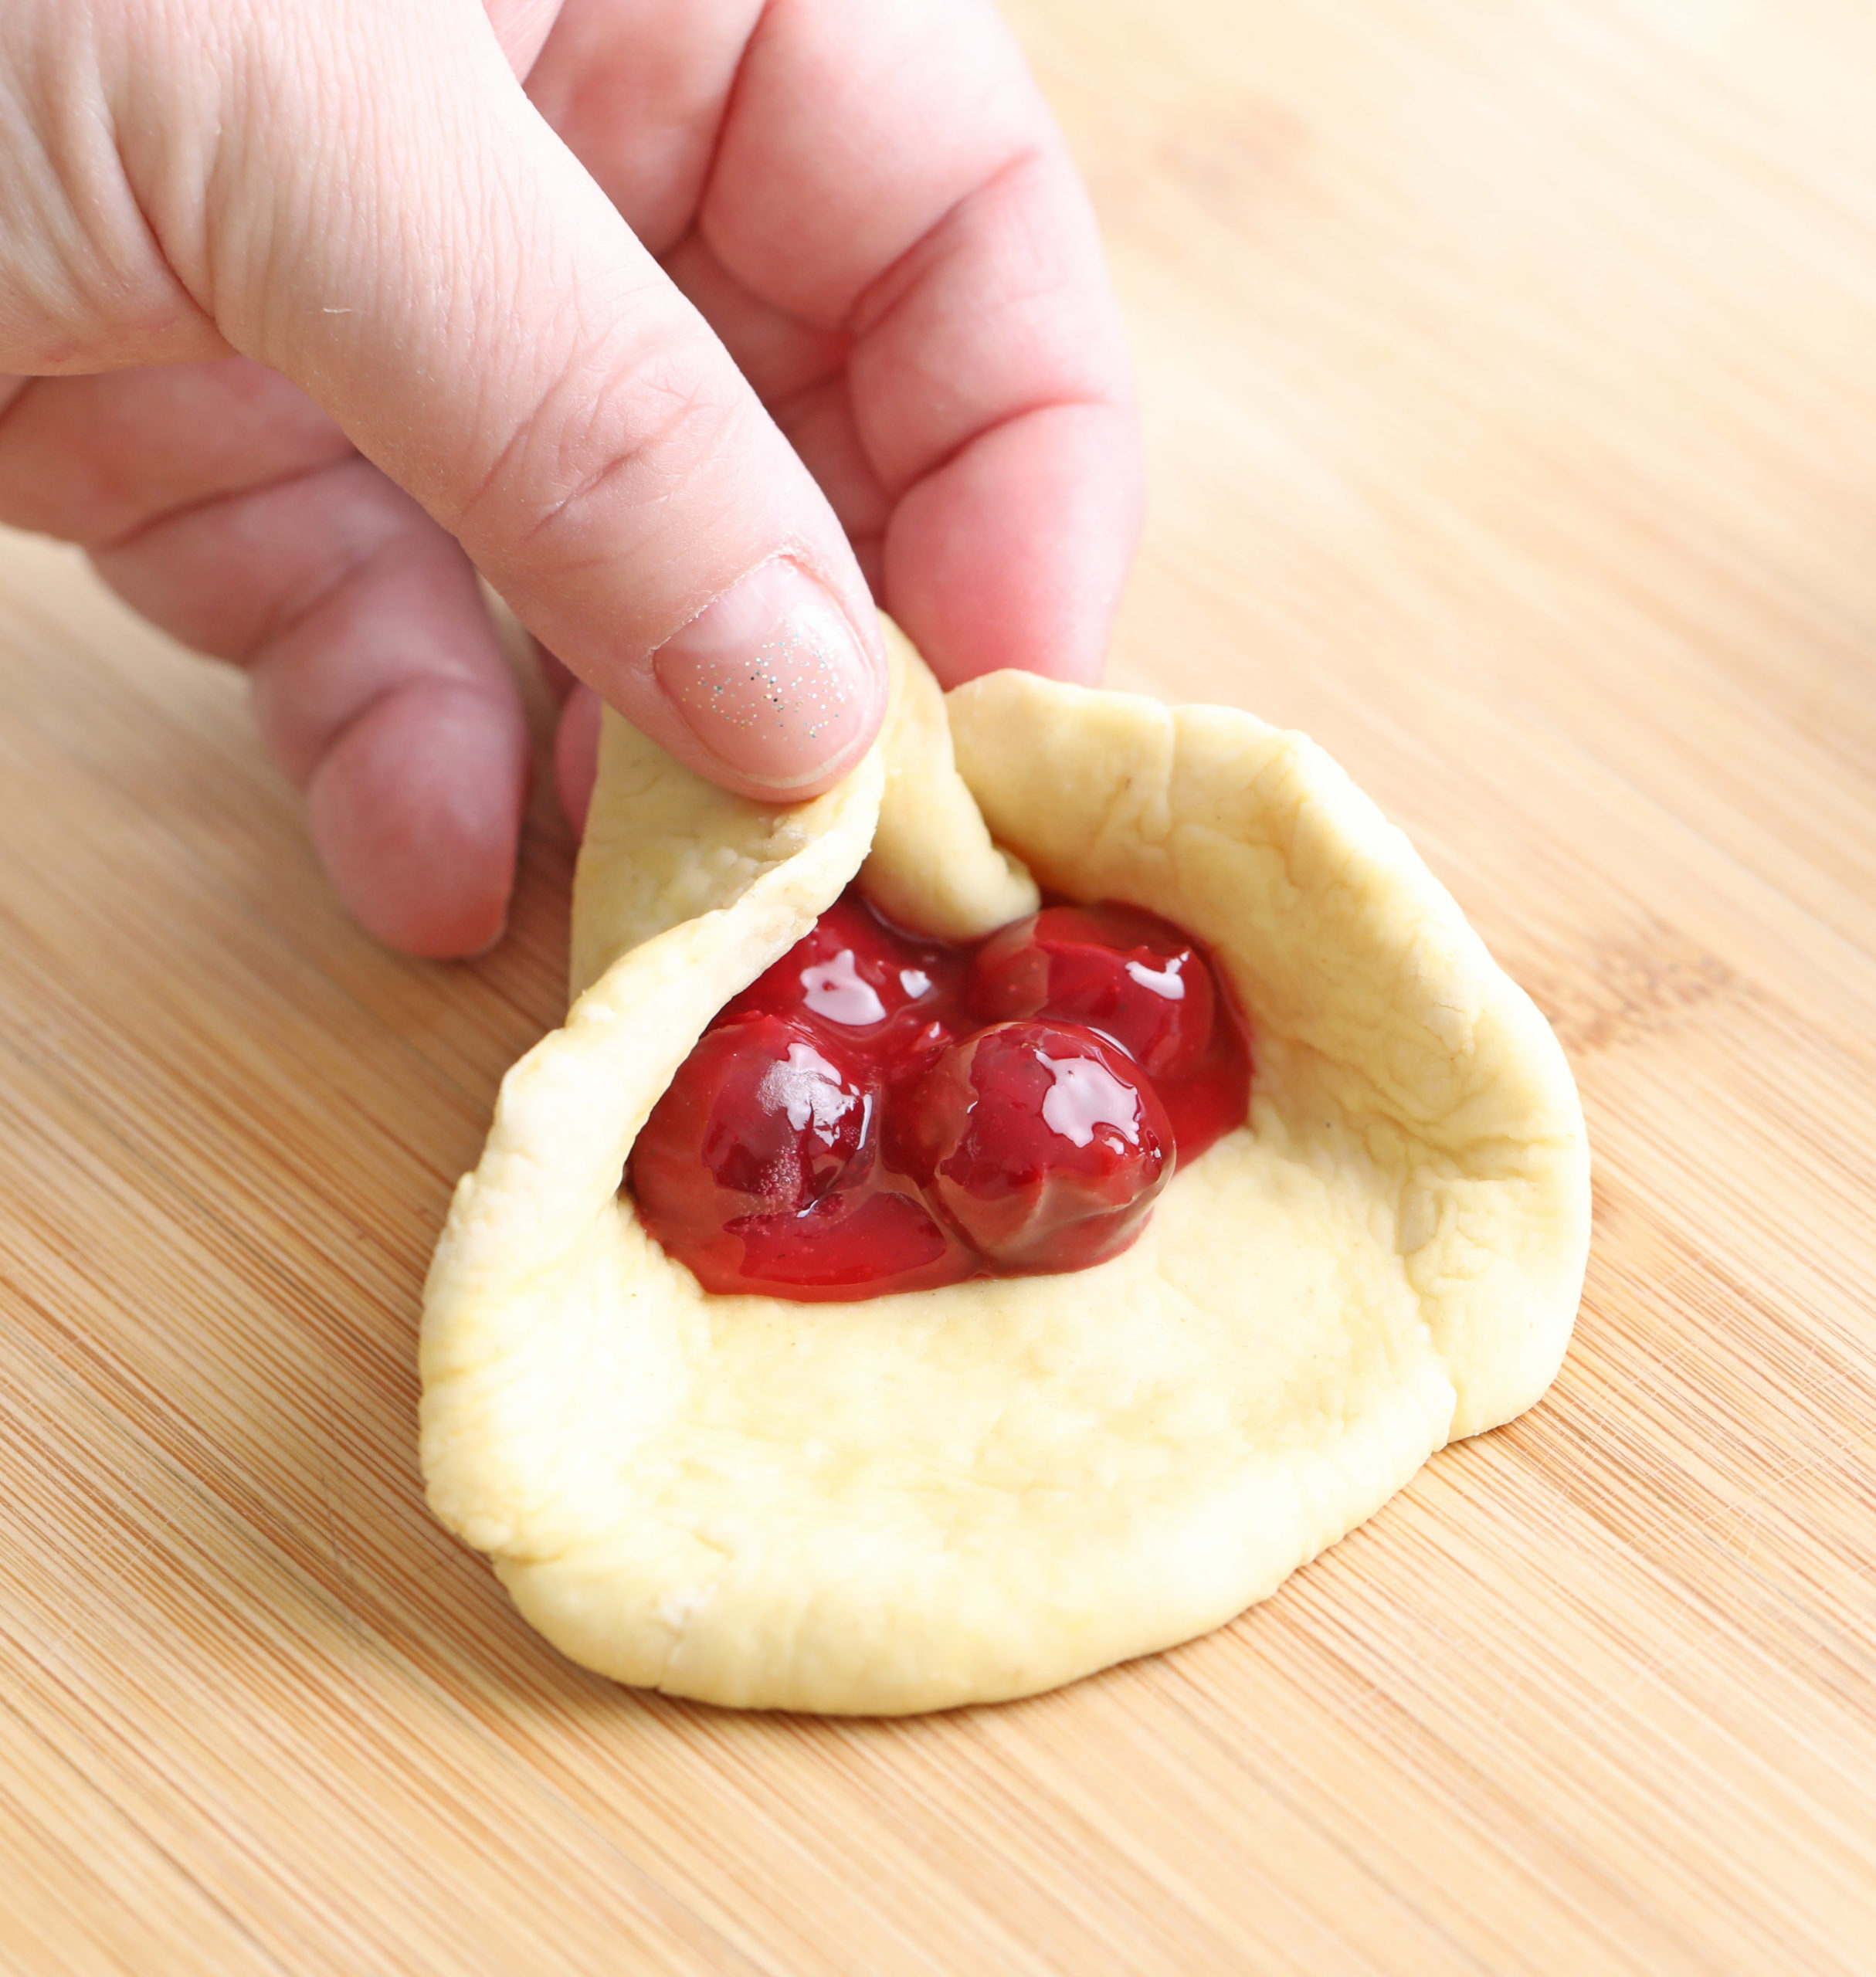
Use your fingers to pinch the dough together, sealing the cherry pie filling within the biscuit dough. Roll the dough into balls.
Brush all sides of the bombs with the melted butter, and roll it in the cinnamon sugar mixture.
Can I Use a Different Kind of Pie Filling?
If you are craving pie bombs with another flavor, try them with apple pie filling, blueberry pie filling, or any of your favorite pie fillings!
Reheating Cherry Pie Bombs
If you have leftovers, which isn’t likely, store them in the fridge covered for up to 2 days. Reheat for about 2 minutes at 300° in an air fryer.
No Air Fryer? No Problem!
Can I Bake Cherry Pie Bombs in the Oven?
Yes! To bake the pie bombs in the oven, follow the same instructions up to cooking them in the air fryer.
Preheat the oven to 375F. Line the baking sheet with parchment paper.
Place them onto a baking sheet leaving them about 2″ apart. Bake for 12-15 minutes until the bombs get nice golden brown color. They may not get quite as golden brown as cooking them in an air fryer, but they are still a yummy dessert!
Serve warm, so the cherry filling is soft and gooey!
I hope you love this delicious and easy recipe – be sure to give it a review below!
Also don’t forget to follow SugarApron on Facebook, Pinterest and Youtube
Cherry Pie Bombs
Equipment
- Air Fryer
Ingredients
- 1 can (8-count) Grand biscuits, not flaky layers or crescent roll dough or Crescent Dough Sheet
- 1 cup cherry pie filling
- 1/2 cup 1 stick unsalted butter melted
- 1/2 cup of cinnamon/sugar blend
Instructions
- Separate the biscuits into two layers and place them on a clean surface.
- Roll out each layer of the dough with a rolling pin or with your hands until it is about 4 inches in diameter. (You will have 16 circles.)
- Spoon about 1 tablespoon of the cherry pie filling into the center of each circle. Pinch the edges together to seal it. Roll the dough into balls.
- Brush all sides of the bombs with the melted butter, and roll it in the cinnamon sugar mixture.
AIR FRYER
- Spray the air fryer basket or racks with oil to keep the bombs from sticking. Lay bombs in single layer of air fryer basket or racks.
- Make sure to space them out so they aren't touching & have room to rise & expand (about 2 inches apart). Cook in batches, depending on how many you can fit in your basket.
- Air Fry at 330°F for about 6-7 minutes. Gently wiggle the bombs to loosen from the baskets.
- Continue to Air Fry for another 1-2 minutes, or until they are crispy brown and cooked through. Serve warm.
OVEN BAKE
- Preheat the oven to 375F. Line baking sheet with parchment paper.
- Place them onto a baking sheet leaving about 2″ apart. Bake 12-15 minutes until the bombs get nice golden brown color. Serve warm, so cherry filling is soft and gooey!
Notes
- 1/2 cup granulated sugar
- 2 cups cherries fresh or frozen pitted, thawed
- 1 Tablespoon lemon juice is optional but recommended if using sweet cherries
- 1/8 teaspoon cinnamon optional
- 4 Tablespoons warm water
- 3 Tablespoons cornstarch
-
Make a cornstarch slurry: Whisk together the water/lemon juice and cornstarch in a small bowl.
-
Combine the cherries and sugar and cinnamon(optional) in a small saucepan over low-medium heat, for about 10-12 minutes, until the cherries start to soften, break apart, and release their juices. If your cherries are not very juicy, you may want to add water (from a few tablespoons to ½ cup depending on your fruit) to thin your sauce.
-
Mix in the cornstarch/water. Gently simmer for 3 minutes until the sauce begins to thicken. Set aside and let it cool to room temperature before using.